Item Legacy Media · Tutorial
Item Legacy Tutorial: Build and Maintain Your Collection Inventory
Build a useful inventory one record at a time. Follow a collection and watch record through saving, photographs, supporting documents, details, search, summaries and a checked CSV export. Use the chapters to return to a specific task.
10:57 · English
This video uses AI-generated narration.
English captions available in the player controls.
Read transcriptAccount tools and allowances may differ by plan. Cost, condition and estimates are owner-recorded. The CSV contains record information and attachment counts; keep original photographs and documents separately.
Read the transcript
A useful inventory starts with one record you can recognize, find, and keep up to date. In this tutorial, we’ll build that record together: a collection, an item, its photograph, supporting notes, and a copy of the saved information. Use the chapters to return to a particular task.
Sign in to your existing Item Legacy account. We’ll pick up after sign-in, without entering account details on screen. This walkthrough uses the desktop layout. Available tools and allowances can depend on your plan, so your account may offer a different set of options.
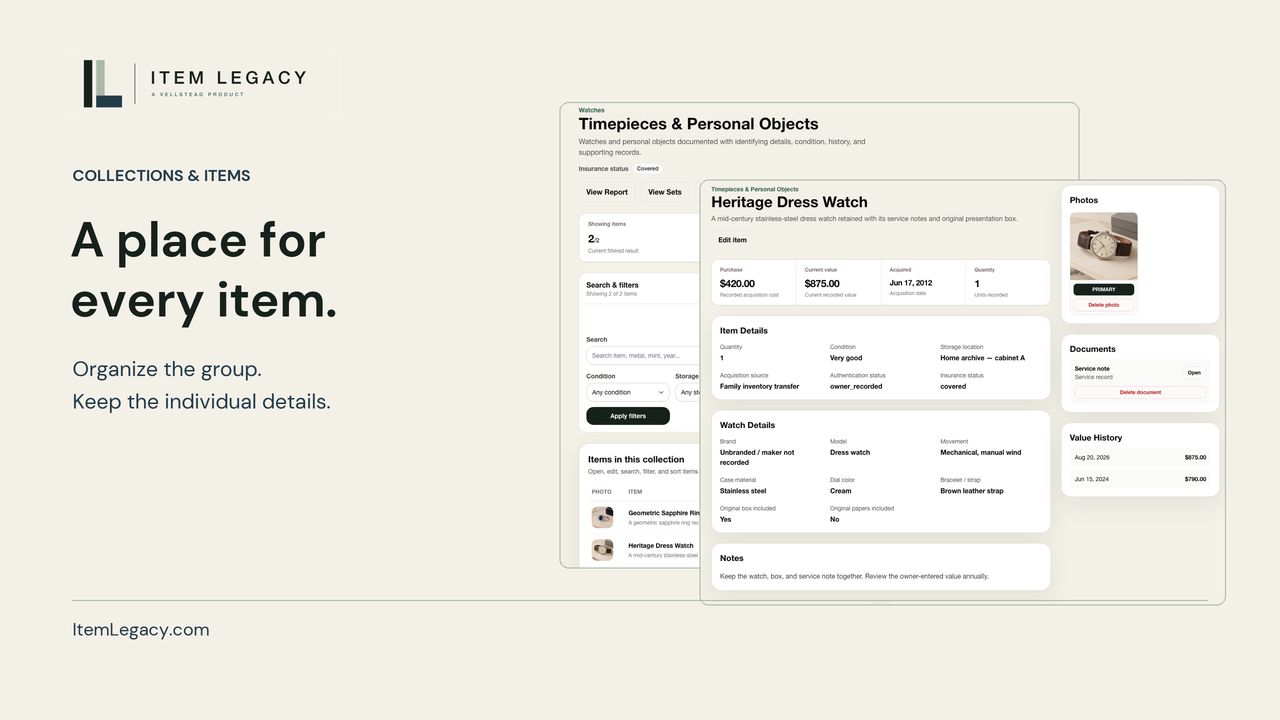
The Collections page groups related objects. All Items helps you find records across those groups. Add Item starts a new entry, and Import and Export holds the tools for moving record information. We’ll begin in Collections, then follow the same item through the rest of the walkthrough.
A collection is the group; an item is an individual record inside it. Choose a grouping you’ll remember, such as a collecting area or a room. Here, select New collection and name the group Everyday Timepieces. You can use an existing collection instead if it already fits.
Choose Watches as the category. Add a short description of what belongs here, and a general storage location if that is useful. Leave insurance status at Needs review unless you have confirmed something more specific. An inventory label by itself does not establish insurance coverage.
Select Create collection. The saved collection opens, ready for items. Reload the page and check that the name and description remain. This small check is worth making as you learn the workflow: a filled form and a saved record are two different stages.
From this collection, choose Add item. Check that Everyday Timepieces is selected. The category comes from the collection, so the form can offer watch details. You can leave optional details for later. Begin with a clear item name and the quantity you mean this record to represent.
If you try to save without the required item name, complete the field the form identifies. There is no need to start over. Enter Heritage Dress Watch. For this example, keep quantity at one, so the record describes one watch.
Choose Save and finish later to open the basic record. We’ll add the photograph from the saved item page. You do not need to complete every optional field before making the first useful entry.
The item page now shows Heritage Dress Watch in Everyday Timepieces. Reload it and confirm the same name and collection. When adding several similar objects, this is a good moment to check that you saved the right item in the right place.
Under Add photos, choose a clear image of the object. We’ll use one photograph that shows the dial, case, and strap. Select the file, then wait for the upload to finish before moving on. The photograph gives you a practical visual way to recognize the record.
Wait until the uploaded photograph appears. Reload the item and open the image from the record to check it again. This confirms that the file is available after the original upload screen. Keep your original image file somewhere you control as well.
Under Add document, choose a supporting file. This example uses a short reference PDF describing visible details and open questions. Give supporting files names you can understand later.
After the upload completes, check the filename on the item. Reload, then use Open. In the browser shown here, that action downloads the PDF. Check the downloaded file’s contents. A filename on screen is not the same as checking the document itself.
The reference notes describe the light dial, silver-colored case, and brown leather strap. They also say that maker, age, and service history remain unconfirmed. Keep that distinction in your own records: describe what you know, and identify what still needs supporting evidence.
Return to the item and choose Edit item. Add a concise description that will help you recognize it later. You can return to this form as information becomes available. A useful first record can become more detailed without requiring you to recreate it.
Purchase cost records the amount paid. Current estimated value records your own estimate for the item. Here, those are six hundred eighty dollars and eight hundred fifty dollars. They answer different questions. Their difference is not a realized profit, and the estimate is not a professional appraisal.
Use the fields that fit the object’s category. Record details you can support, such as the dial and strap, and leave unknown maker or movement information blank. For another collecting area, the form can show different fields. Gray text shows examples for an empty field.
Add the acquisition date if you know it, choose the condition that best describes the object, and record a useful storage location. We’ll use Very good and Home archive, cabinet C. Keep sensitive location details no more specific than you need for your own use.
Use Notes to preserve useful context and open questions. Then select Save changes. When the item page returns, reload and check the description, condition, cost, and estimate. If you move the object or learn something new, this is the same route you’ll use to update it.
Open All Items and expand Search and filters. Enter Heritage in Search, then choose Everyday Timepieces in the collection filter. Combining the name with the collection helps distinguish similar records. Apply the filters to see the matching item, then open it and confirm the photograph and details.
Use the browser’s Back control to return to the filtered results. The search and collection selection remain available in this demonstrated path. When you search within a collection, begin with an item name or description rather than assuming every field is searched the same way.
If a search produces no matches, check the words you entered and the filters that are still active. An empty result does not mean the record was deleted. Use Clear filters to return to the full list, then start again with a shorter, recognizable name.
Return to Everyday Timepieces. With one saved item, the collection’s recorded cost and estimate are easy to check against the watch. These numbers summarize saved information. Keep cost and estimate distinct, and review missing details before drawing conclusions from a broader collection total.
If your account includes Insights, it offers a wider summary of recorded information and areas that need attention. Use it as a prompt to review the underlying items. This walkthrough uses U.S. dollar examples; it does not demonstrate currency conversion or a live market-performance view.
To keep a copy of record information, open Import and Export and use the export section. Select the collection you want included. We’ll export Everyday Timepieces so the result is easy to check. Export allowances depend on your plan; review the options available in your account.
Start the CSV download, then inspect the downloaded file. Here are selected fields from the actual export: the item name, collection, condition, and recorded amounts. Confirm that it contains the records you intended to include before putting it away. Keep the downloaded file in a location you control.
The CSV is a copy of record information. Photo and document counts do not mean the original files are included inside it. Keep original photographs and supporting documents separately. This export step is not a demonstration of restoring a complete account or recovering from data loss.
After an important change, update the item, save, and check it again. Review the location when an object moves. Revisit estimates when you have a reason to change them. Add supporting information as it arrives, and make a fresh export when you need an updated copy.
You now have a repeatable path: choose a collection, create an item, check the save, add useful evidence, and find the record again. Start with one object you know well. Then repeat the process at a pace you can maintain. The chapter checklist follows the same sequence.
Start your free inventory at Item Legacy dot com.
On screen
The tutorial follows the Everyday Timepieces collection and Heritage Dress Watch through creating, saving and reopening the same record. Its photograph and supporting PDF are uploaded and reopened.
The item details separate recorded purchase cost from an owner-entered estimate. Search and reset return to saved records. Selected fields from the actual collection CSV are inspected; photographs and supporting documents remain separate from that CSV.
The final card links to signup with a QR code. The same signup action is available below the player.